
Copyright © 2018-2024 nothrow.com. All Rights Reserved. You may not copy and distribute the content from the Site.
The tactics in a football match are the common and purposeful actions of individuals within the team framework with the aim of forming an attack and defence and moving from defence to attack and vice versa.
What I will try to do is to have the rigid defensive formation shape for my defence and the flexible for my attack.
Also, I choose a basic 1-4-4-2 formation, as this formation seems to be the hardest one to set-up two different shapes for two different phases of play.
Formation
The formation is designed for the purpose of organizing players action, location and lines in the defense, attack and transitional phase of a football match.
For this article purpose, I will use 1-4-4-2 as a basic formation.

The concept
Defence
It is a quite simple, I want to defend in tight and compact 4-4-2 formation. In the defensive stage of play I want my team shape to be like this:

So, we have 3 lines of defence;
First line: Two attackers, one is putting some pressure on opponents defenders, and the other one is covering defensive midfielders/playmakers.
The second line are midfielders and wingers covering each his own zone.
The third line are defenders with the same task.
I want these lines to be tight (as close as possible), so for the first and second line of defence I lowered closing down players mentality.
Also, as they have to be compact, the defensive line is set to high.
In this way, the opponent will have very little space in midfield and has to play long balls and switch ball to other flank in a fast way.
All of this is easy to anticipate and launch the counter-attack.
Attack:
As the opponent has a way better team we need some element of surprise to catch them off guard.
For this, I will use my left fullback as an extra addition to my midfield.
By doing this I plan to have an extra player in midfield and more time and opportunity to play through balls for my attackers.
Also, I expect a lot of one on one situations for my left winger.
And for the right side, it is a simple set-up, right midfielder cut in the middle and leaves empty space for attacking fullback/wing back.
Style
The style is highly structured (if I were facing an easier opponent this would probably the less structured or standard)
Tackling is set to stay on feet, I don’t want to lose a player in defence shape after a poor tackle.
And a few players have some extra individual instructions.
What I expect
I want to see average players position without the ball to be the basic compact 4-4-2.
And for positions with the ball to be different, left winger almost like a third attacker, left fullback to be the midfielder, and attacking midfielder to be in position behind the attackers, like AMC.
Basically, I wanted to see two very different formations of my team, one for the defence and one for the attack.
How to attack and defend in a flat 4-4-2 formation
The key to success? The right tactical approach. Listen to tactics expert Manuel Baum as he tells you about offensive and defensive strategies in a flat 4-4-2 formation.For more videos and info visit http://www.soccercoachclinics.com
Posted by Soccer Coach Clinics on Thursday, October 22, 2015
The results
Defence
This is what my defending shape looked like:
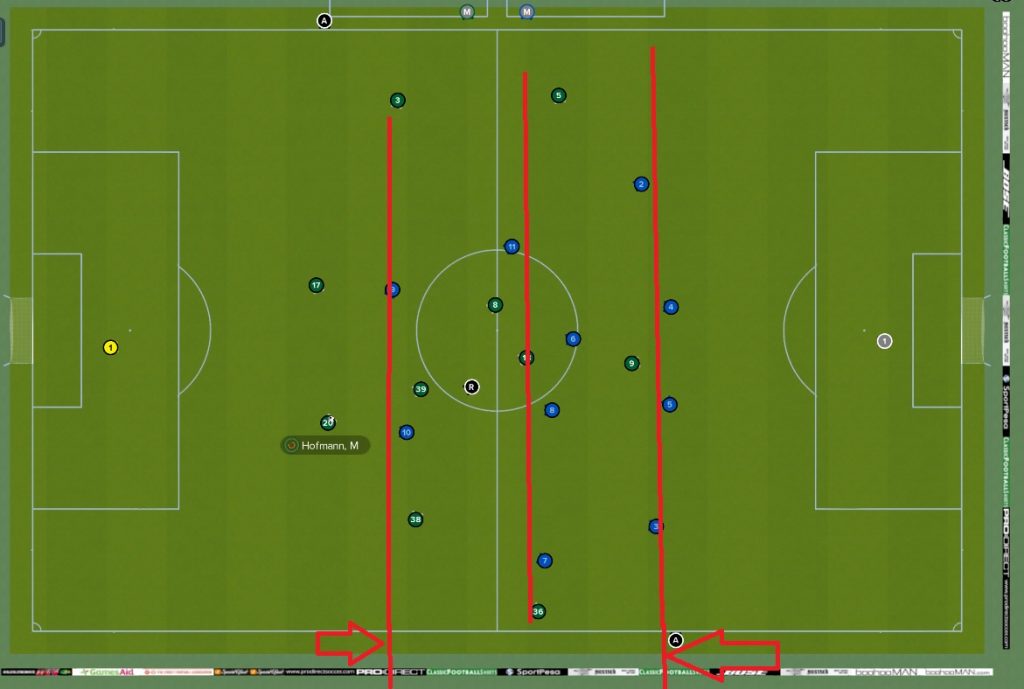
What I didn’t like is the position of the right attacker (false 9). I did change him to be the defensive forward but even then he didn’t close down defensive midfielders.
So, after the first ten minutes, I identified who was the primary playmaker of the opponents’ team, and I choose to man-mark him.
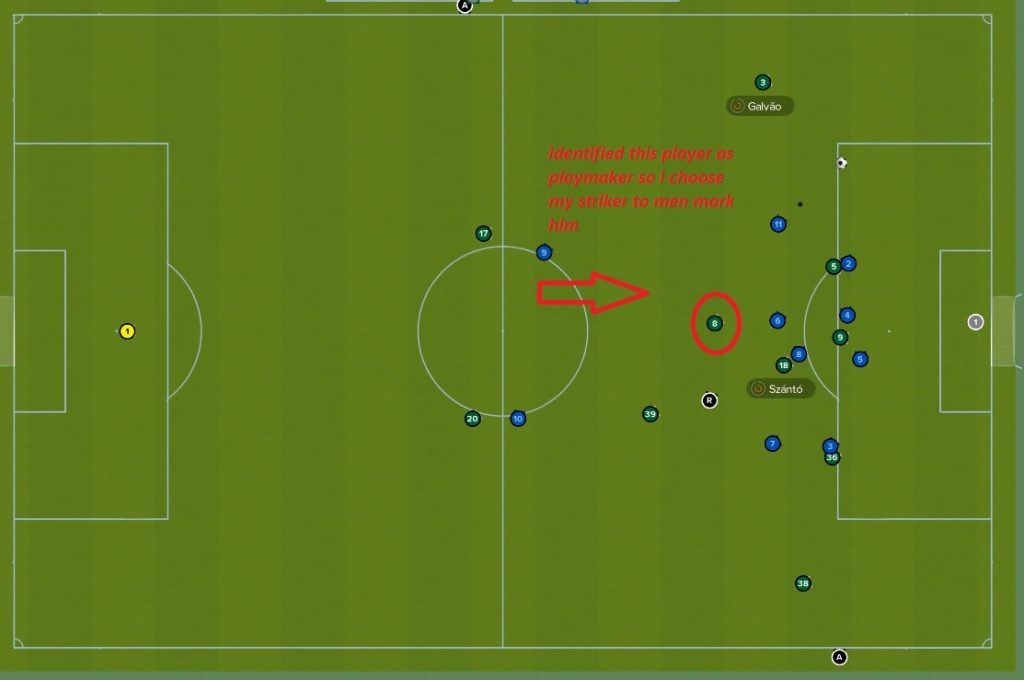
Now my attacker is closing down the playmaker and the other is closing defenders
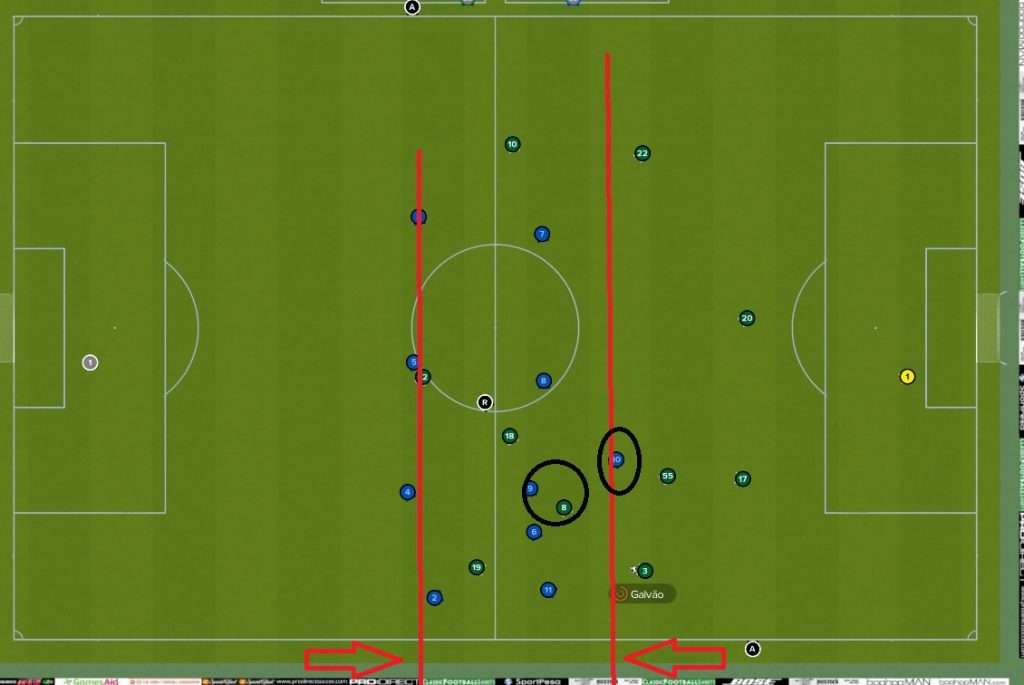
OK, I’m very happy with this, let’s go to the attack phase.
Attack and transition
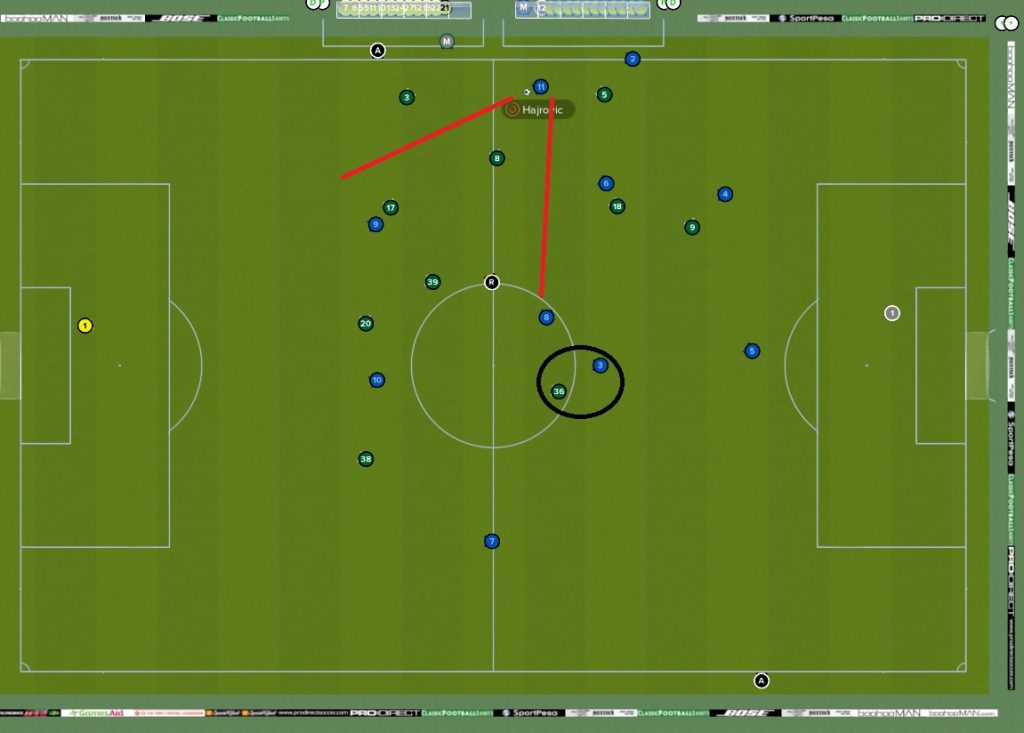
This is the transition after winning the ball on the right side
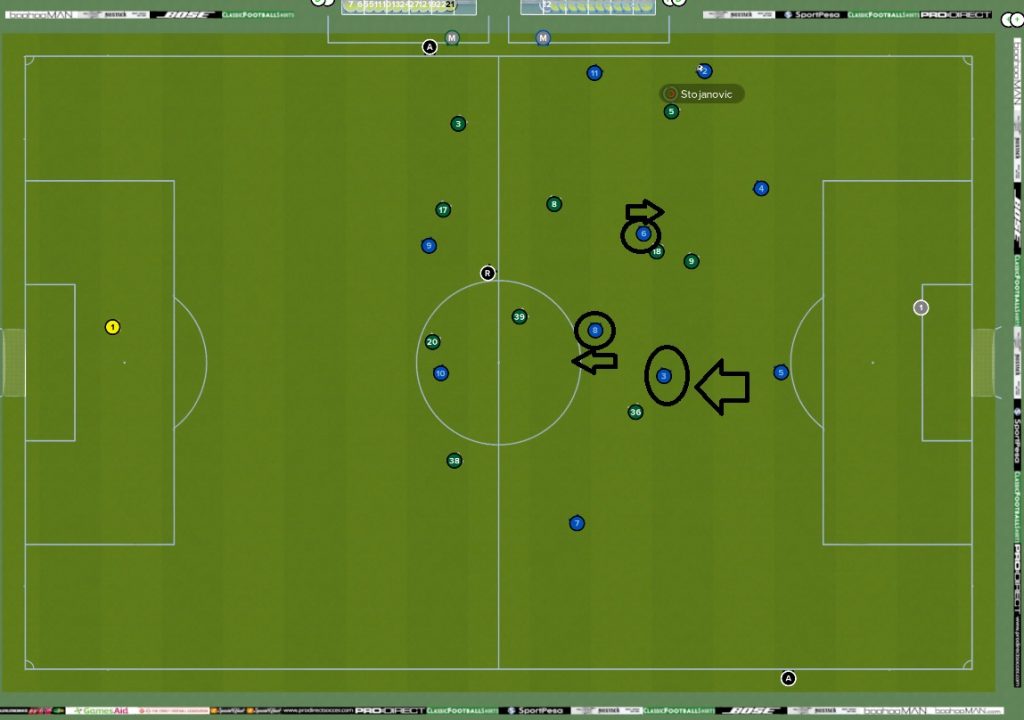
As my left back immediately occupies the middle I have an extra men which is free to receive the pass.
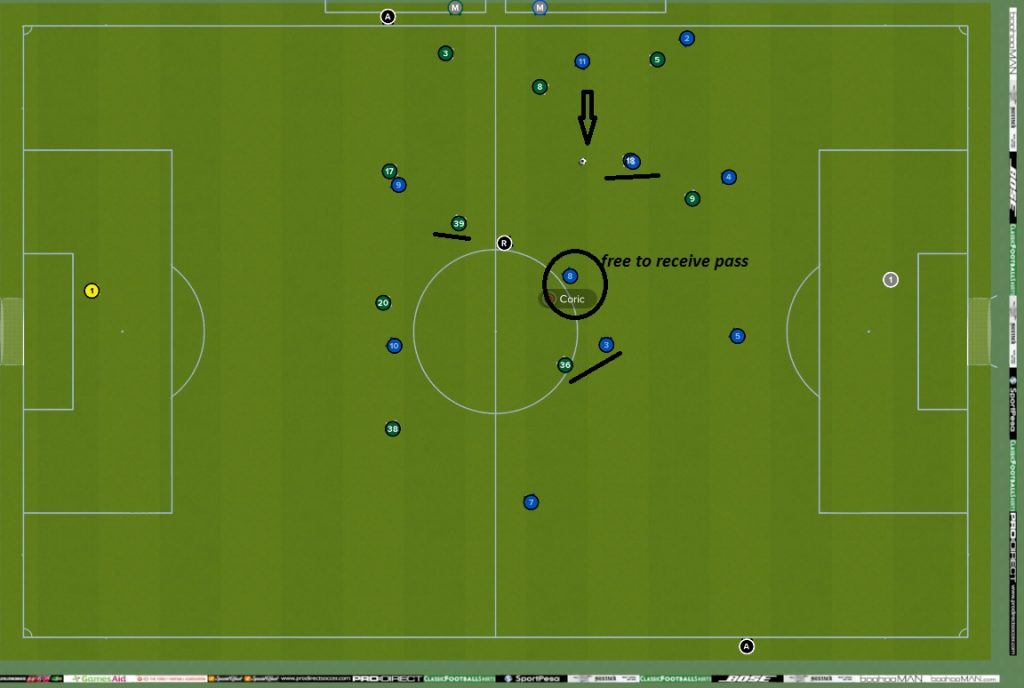
After that, he has a lot of through ball options.
And that is checkmate in only three passes!
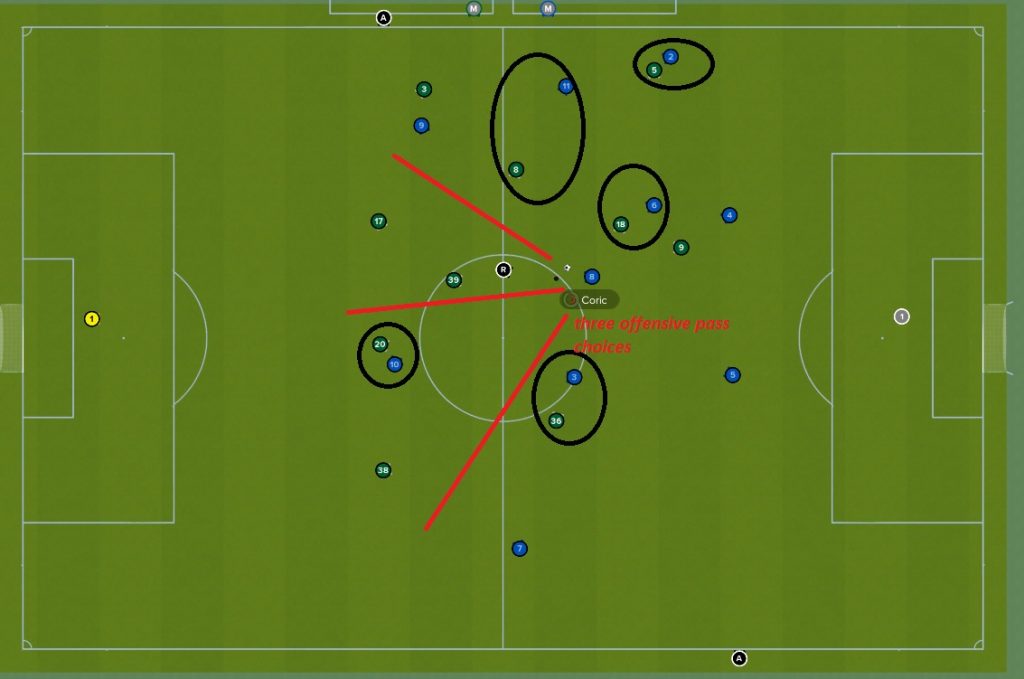
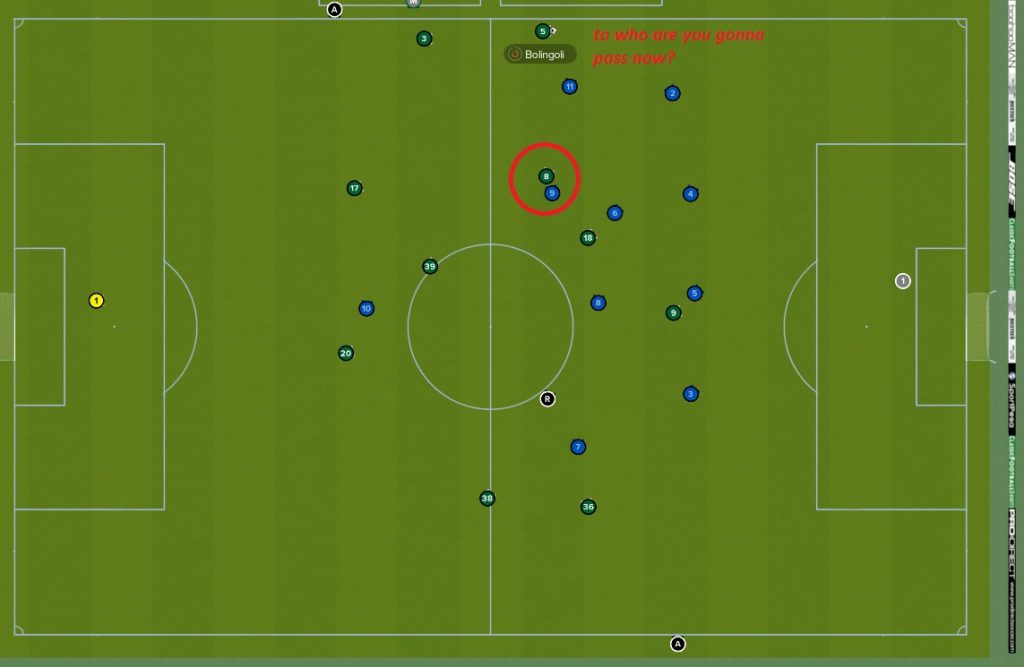
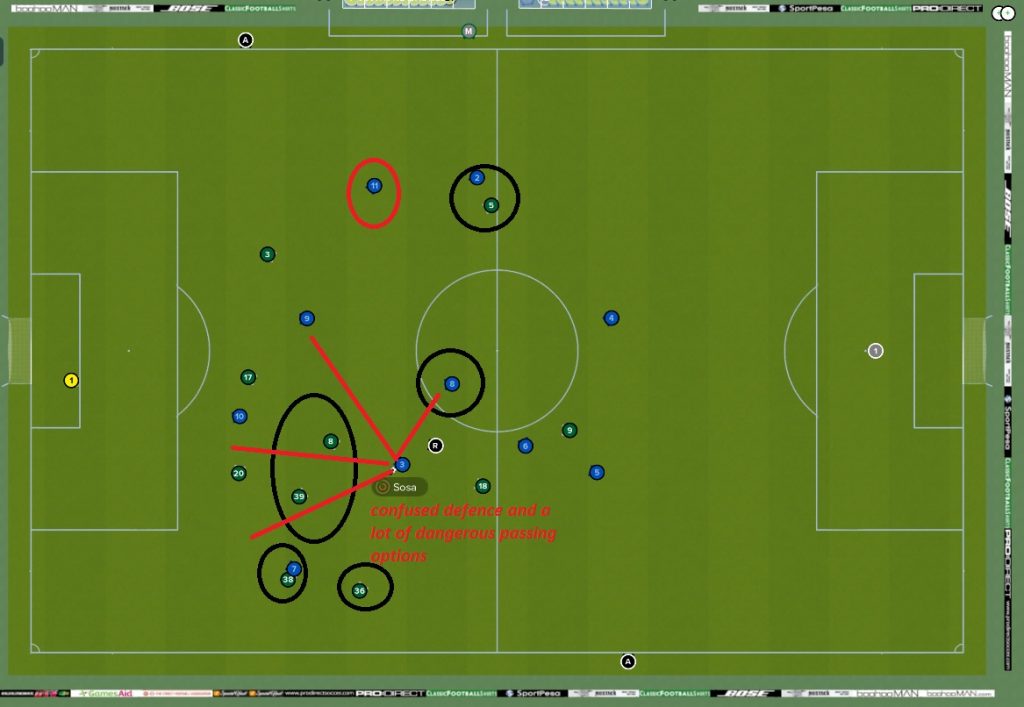
Another similar situation on the right side where now right midfielder has the ball and a few pretty good passing options.
Here is one more similar situation, now he can play on the wing to arriving fullback/wing back.
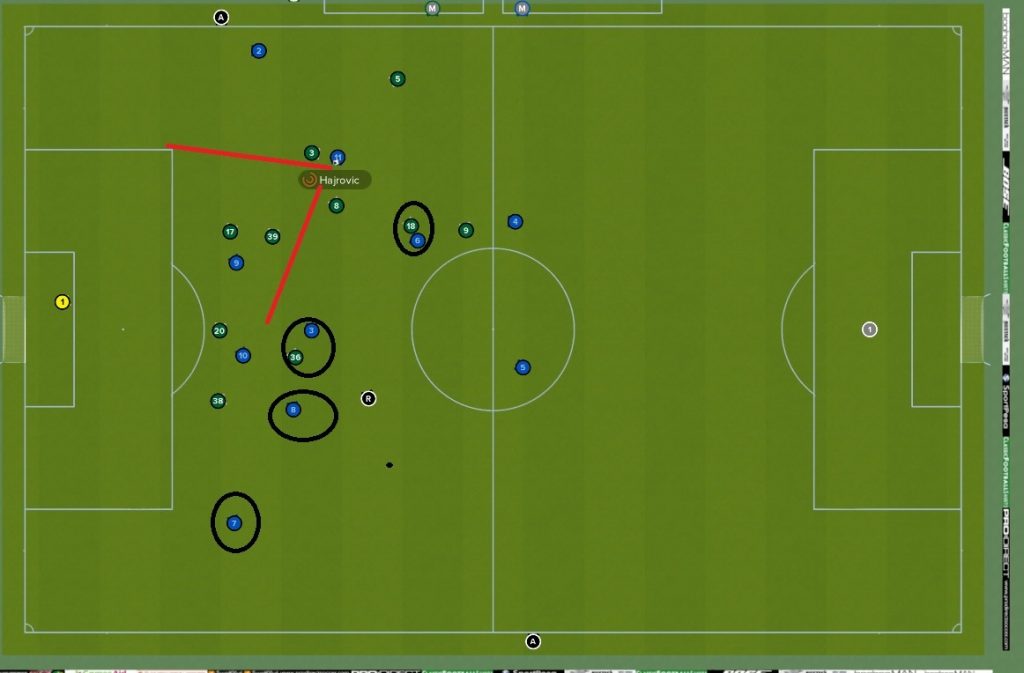
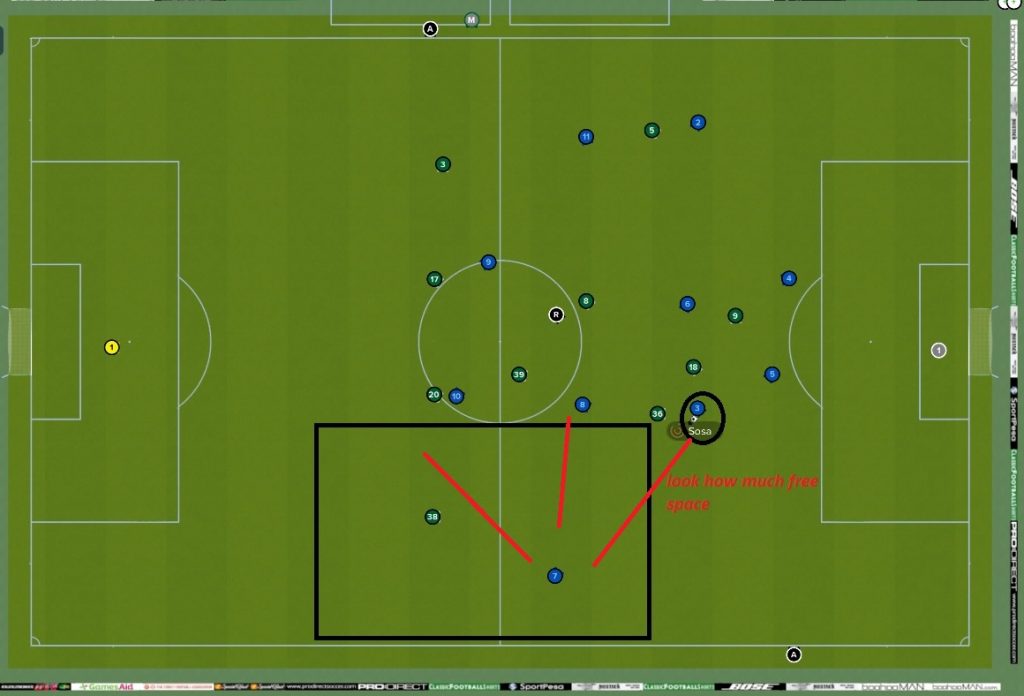
And now situations on the left side.
Left-back win the ball, then passes to left winger and run in the midfield.
The left winger has one-on-one, he can run with the ball by the byline, or cut inside and pass.
He chose to cut inside and pass back to left back, who is totally free as the opponents defence is confused by this movement.
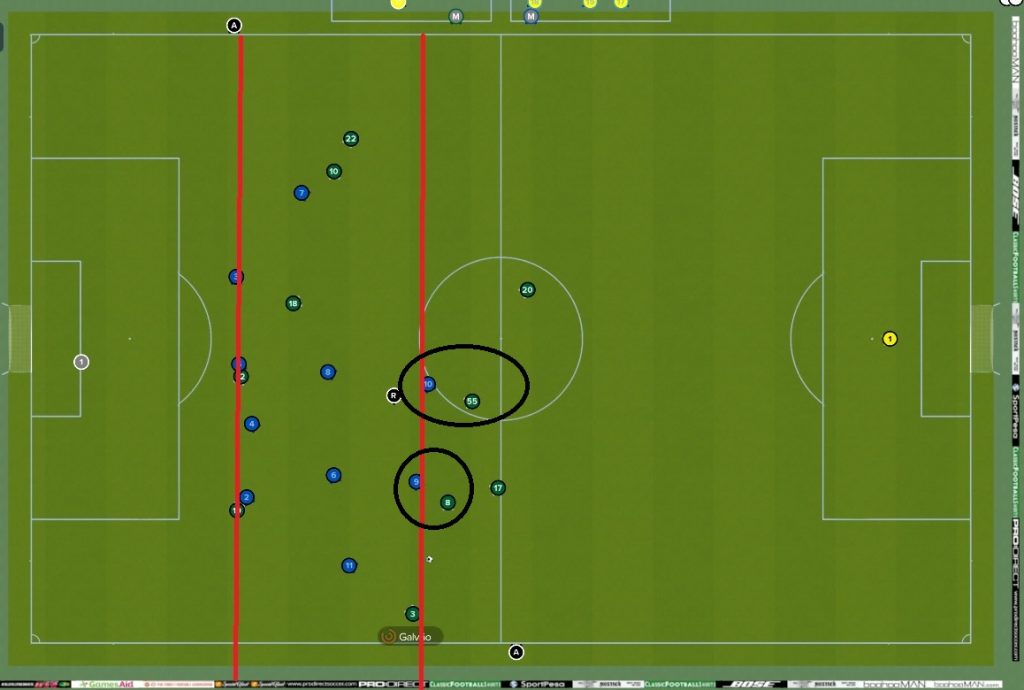
Watch their AMR-number 36, he is just wasting space!
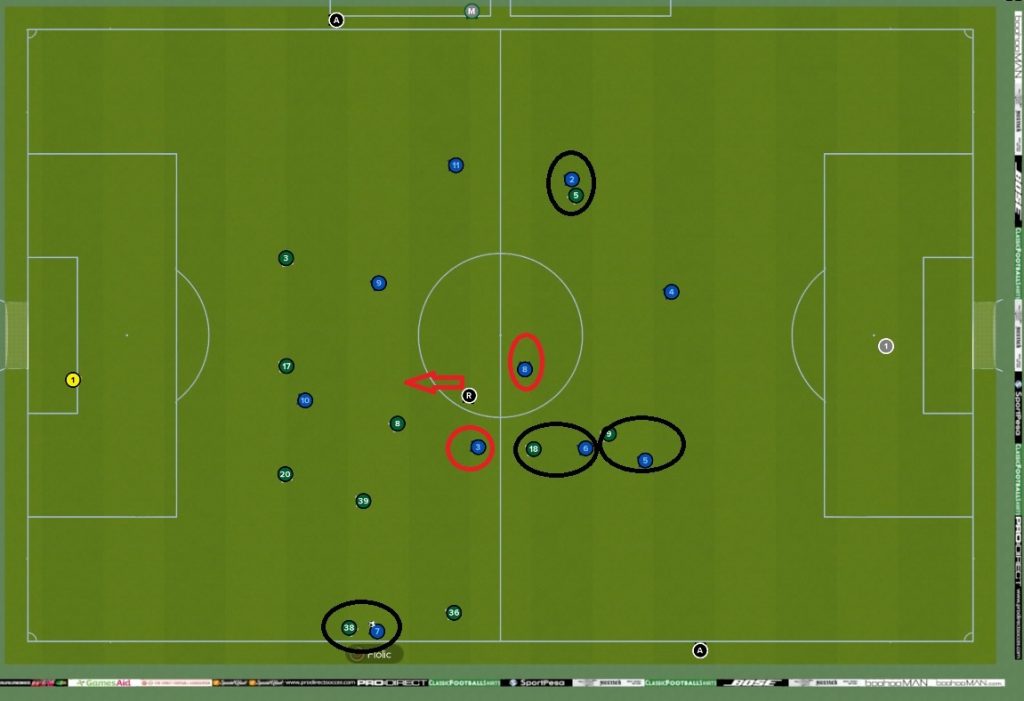
And again similar situation, but now 36 is much smarter and he chose to follow the left back, but look all that empty space he left behind.
Left-back make an easy pass to my left winger who has now great passing options or he can go again one on one.
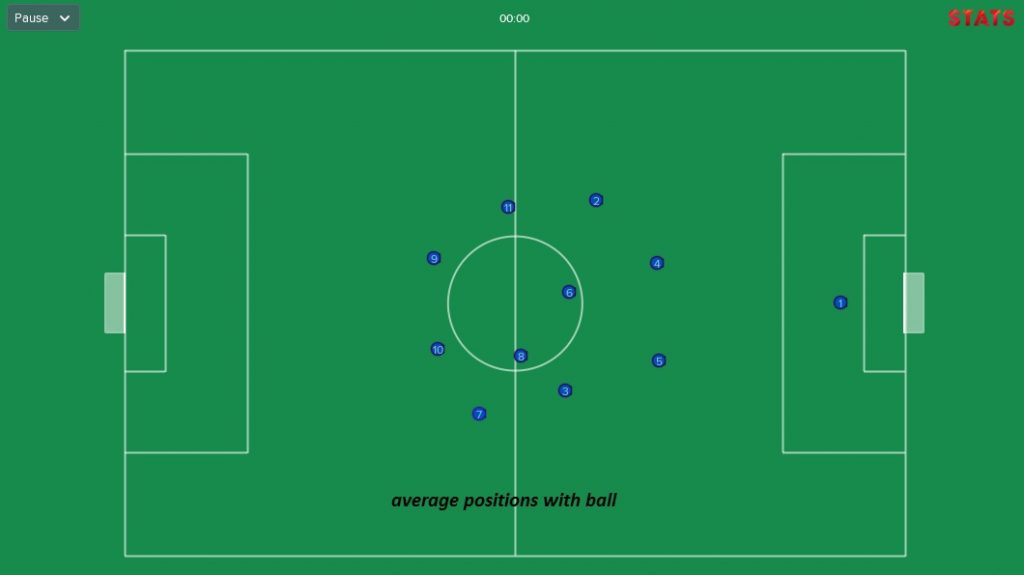
Average positions
OK, so the basic concept I had in mind for this match is working.
But, what are the final results, I want to see that on average positions map.
First the defence, I wanted a compact 4-4-2.
The result is great:
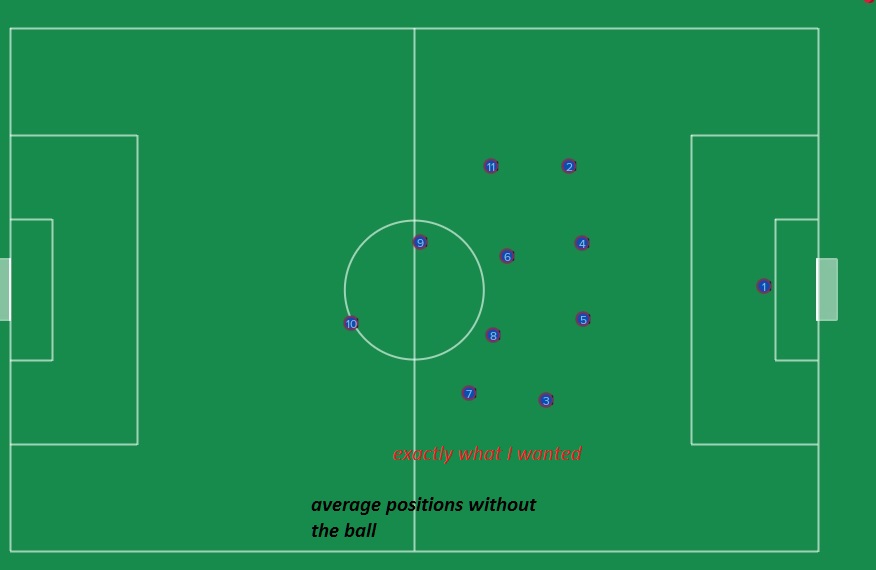
And now the attacking phase:
Oh yes! I am very happy with this, as this proved me that I could make two different formation shapes in attack and defence, against a much stronger team, and still win a game!
When facing the weaker team I would pick the less structured shape and go for the control mentality.
Give us feedback: Was his article helpful?
Comments are closed.